DIY Raised Garden Bed: Step-by-Step Guide
A beginner-friendly plan for a 4x8 cedar raised bed you can build in a weekend for about $200.
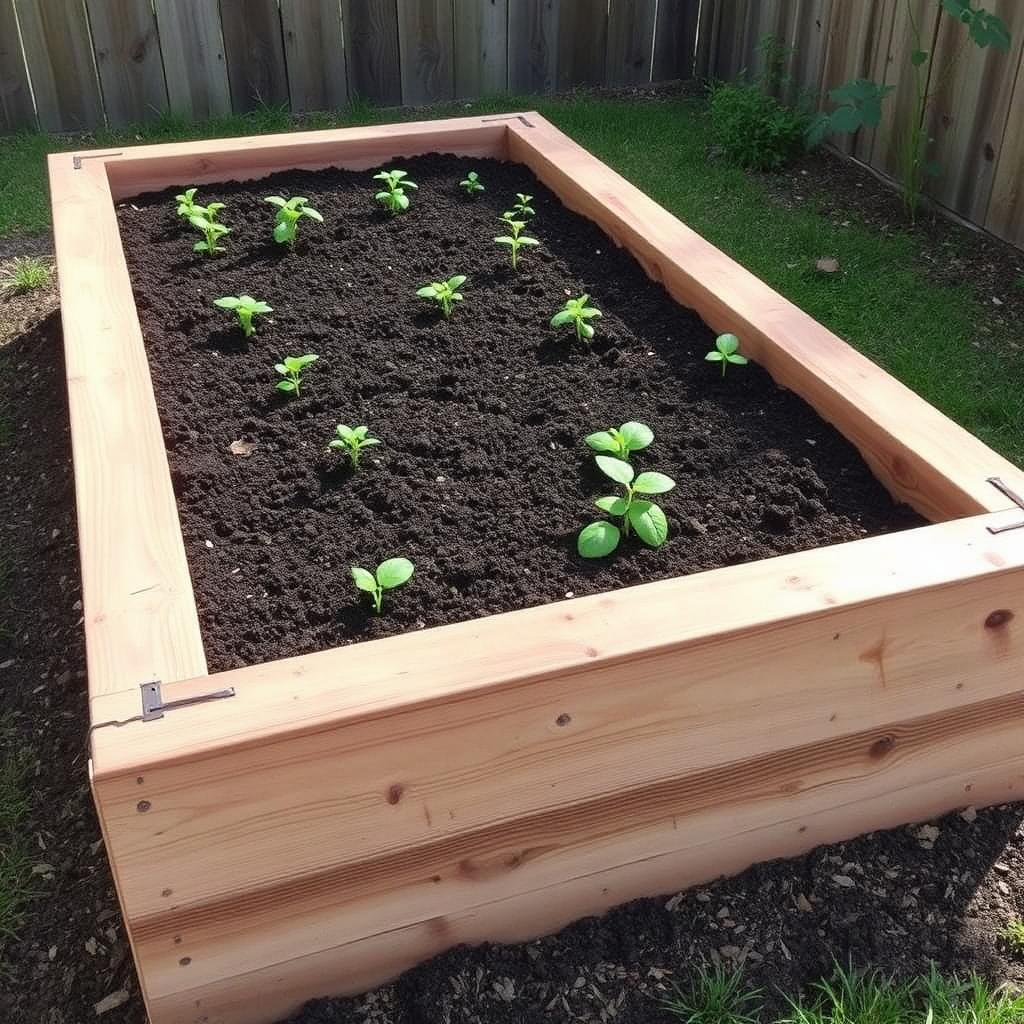
A raised garden bed is the fastest way to go from bare yard to real harvest. You skip the years of soil improvement in-ground gardens require, drainage is better, and the height is easier on your back.
This guide walks through a standard 4-by-8-foot cedar bed, a common size for home gardens. It costs roughly $180 to $250 depending on lumber prices, takes one focused Saturday, and needs only basic tools.
Why Cedar (or Douglas Fir)
Untreated cedar and Douglas fir naturally resist rot for 7 to 12 years without leaching anything into your soil. Skip pressure-treated pine for food gardens; while modern treatments are far safer than older CCA lumber, many food gardeners prefer to avoid them. EPA: Information on Pressure-Treated Wood
Redwood works if you live on the West Coast; hemlock and untreated pine are cheaper but will last only 3 to 5 years.
Materials List
Everything below is sized for a 4-by-8-foot bed, 11 inches tall (two stacked 2x6s).
- Six 8-foot 2x6 cedar boards (four full length, two cut into 4-foot ends)
- One 8-foot 4x4 cedar post cut into four 11-inch corner blocks
- About 32 exterior-rated 3-inch deck screws (star-drive hold better than Phillips)
- Landscape fabric or hardware cloth for the bottom (optional but recommended)
- Roughly 32 cubic feet of raised-bed soil blend
- Two-inch layer of straw or shredded leaves for mulch
Tools You'll Need
A basic tool kit is enough. Borrow a miter saw if you do not own one; big-box stores also cut lumber to length at the counter.
- Cordless drill and driver bit
- Miter saw or circular saw
- Tape measure and speed square
- Level
- Shovel and rake for site prep
Step 1: Pick and Prep the Site
Choose a level spot with six to eight hours of sun and easy hose access. Mark the 4-by-8-foot footprint with landscape marking paint.
If your site is lumpy, dig off the sod and rake the soil flat within about half an inch across the footprint. A level bed is critical; water pools in the low corners of a tilted bed.
Step 2: Cut the Lumber
Cut two of the 8-foot 2x6s into four 4-foot end pieces (you will use four full-length boards for the long sides and four short pieces for the ends).
Cut the 4x4 post into four 11-inch corner blocks.
Step 3: Assemble the Frame
Stand a corner block on end. Attach one 8-foot side board flush with the outer edge of the block using three screws. Repeat with a 4-foot end board on the perpendicular face of the same block.
Work your way around the rectangle attaching the first course of boards to all four corner blocks. Then stack and attach the second course on top, staggering the screws so they do not hit each other.
Check the frame is square by measuring diagonally corner to corner; both diagonals should match within a quarter inch.
Step 4: Place the Bed and Line the Bottom
Set the finished frame in position and check level. Shim low corners with a scoop of soil until level within about a quarter bubble.
If burrowing rodents are common in your area, staple half-inch hardware cloth to the bottom edge of the frame before placing. Otherwise a layer of cardboard or landscape fabric is enough to smother grass under the bed.
Step 5: Fill With the Right Soil
A 4-by-8-by-11-inch bed holds roughly 32 cubic feet of soil, or a bit over one cubic yard. Order bulk from a local landscape supply if you can; bagged soil is convenient but two to three times more expensive.
Aim for a blend of 60 percent quality topsoil, 30 percent finished compost, and 10 percent aeration material. Rake smooth and water once thoroughly to settle any air pockets, then top up any low spots.
Step 6: Plant and Mulch
Follow the spacing on your seed packets. A 4-by-8-foot bed comfortably holds two tomatoes, a row of bush beans, a block of lettuce, a couple of basil plants, and a small trellised cucumber, with room left over.
Top with two inches of straw or shredded leaves once seedlings are up. Mulch reduces watering frequency and blocks most weeds.
Ongoing Maintenance
Top-dress with an inch of compost every spring and fall. Rotate crop families each year (do not plant tomatoes in the same spot two years running) to reduce pest and disease pressure.
Inspect corner joints each spring and drive in any screws that loosened over winter freeze cycles.
Sources & References
• EPA: Information on Pressure-Treated Wood Safety
• UMN Extension: Raised Bed Gardens: Materials and Construction
• USDA NRCS: Building Better Soil in Your Garden
Frequently Asked Questions
How deep should a raised garden bed be?
Eleven to twelve inches is deep enough for almost every vegetable including tomatoes, peppers, and root crops. Deeper beds hold moisture longer but cost more to fill.
Is pressure-treated wood safe for a vegetable bed?
Modern MCA and ACQ treatments are considered safer than older CCA, but most food gardeners still prefer untreated cedar, Douglas fir, or redwood to avoid any risk.
How much soil do I need for a 4x8 raised bed?
For an 11-inch-tall bed, roughly 32 cubic feet, or about 1.2 cubic yards. Order 10 percent extra for settling.
How long will a cedar raised bed last?
Seven to twelve years in most climates. Adding a coat of raw linseed oil each spring extends life by several more years.
Conclusion
One weekend, a stack of cedar, and the right soil is all that stands between you and a garden bed that will feed your family for a decade. Build carefully once and enjoy the harvest year after year.
About the author
DIY & Home Maintenance Contributor
Emily writes the weekend build and upkeep pieces — cut lists, tools, what a project actually costs, and where a job is better handed to a licensed trade.
More from Emily CarterPublished · Updated
Related articles
How to Start a Vegetable Garden: A Practical Beginner's Guide
Everything a first-year gardener actually needs to know to grow real food this season, without the overwhelm.

How to Choose Mulch for Flower Beds and Gardens
Which mulch to use where, how much to apply, and the common mistakes that starve or drown plants.

10 Common Gardening Mistakes and How to Avoid Them
Common gardening mistakes that can cause problems each season, and the simple fix for each.
Fresh home & garden ideas, every Sunday.
Join American homeowners getting practical home & garden advice on gardening, landscaping, and DIY. Free, no spam, unsubscribe anytime.