DIY Vertical Garden Planter: Weekend Plans for Small Yards and Patios
A weekend woodworking project for tight spaces: cedar cut list, tool guide, assembly steps, drainage and soil notes, and estimated material costs.
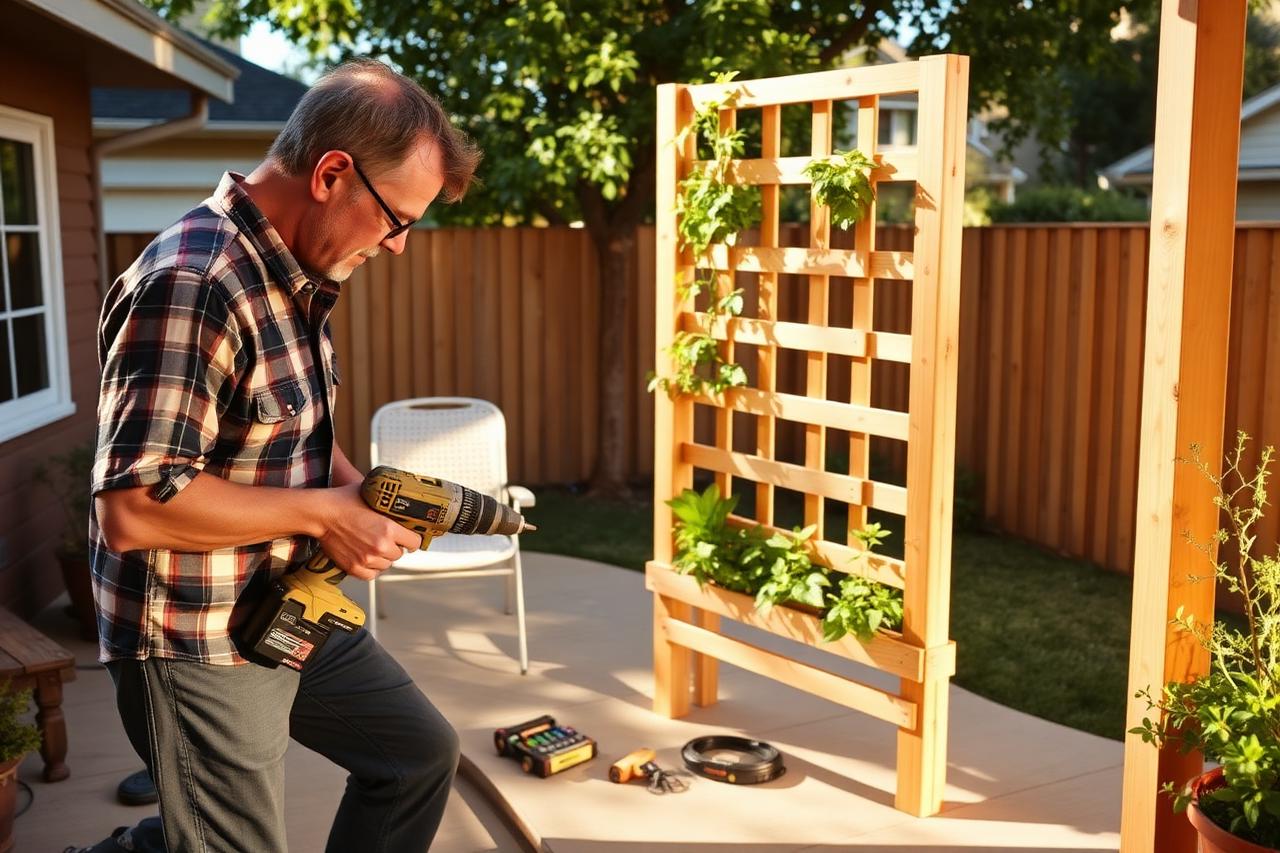
Small patios and narrow yards run out of floor space long before they run out of wall space. A vertical planter uses that height instead, stacking three shallow planting boxes on a single frame so herbs and salad greens sit within easy reach and a bare fence or utility unit gets partly screened.
The plans below use deeper-than-usual planting boxes, drilled drainage holes in every bottom board, and a trellis-backed frame where the uprights carry the load rather than the box corners. Cedar keeps the build simple, since it resists decay without chemical treatment. How long it takes depends on your tools and experience, but the cut list is short and the joinery is all butt joints and screws.
Materials, Cut List, and Estimated Material Cost
Cedar and redwood are the easiest choices here. Both resist decay without chemical treatment, which many gardeners prefer for boxes holding edible crops. If you would rather not have growing medium in direct contact with pressure-treated wood, use untreated cedar or redwood for the boxes and save any treated lumber for the feet that touch the ground. Standard pine works only if you line the boxes and repaint every couple of years.
The finished planter measures 48 inches wide, 68 inches tall including the top trellis, and 10 inches deep, with three staggered planting tiers. The boxes and bottoms come out of 1x8 cedar, the frame uses two 2x2 cedar uprights, and the trellis section uses 1x2 cedar slats. A nominal 1x8 board is roughly 3/4 inch thick and 7-1/4 inches wide, so the 8-1/2-inch end pieces plus the two 3/4-inch front and back boards give the 10-inch outside depth.
Add up the 1x8 pieces before you shop: nine boards at 46 inches (six box fronts and backs, three bottoms) plus six ends at 8-1/2 inches comes to 465 inches, about 38.75 linear feet. Four 8-foot boards only supply 384 inches, so they are not enough. Because a 96-inch board yields two 46-inch pieces with about 4 inches left over, plan on six 8-foot 1x8 boards: five boards cover the nine 46-inch pieces, and the sixth yields all six 8-1/2-inch ends with material to spare for saw kerf and mistakes.
- Cordless drill with a #2 square driver and a 1/8-inch pilot bit
- Circular saw or miter saw (many lumber yards will cut the long boards for you)
- Speed square, tape measure, clamps, and a pencil
- Safety glasses and hearing protection
- Work on a stable, level surface and clamp each board before cutting
- Follow the safety instructions that came with your saw and drill
- Check that the assembled frame stands steady before you add any soil
| Part | Material | Quantity | Dimensions | Est. cost |
|---|---|---|---|---|
| 1x8 cedar boards to buy | 1x8 cedar | 6 | 8 ft each | $117 (estimate) |
| Box fronts and backs | cut from 1x8 | 6 | 46 in. | included |
| Box ends | cut from 1x8 | 6 | 8.5 in. | included |
| Box bottoms | cut from 1x8 | 3 | 46 in. | included |
| Frame uprights | 2x2 cedar | 2 | 68 in. | $24 |
| Trellis slats | 1x2 cedar | 8 | 44 in. | $32 |
| Hardware | 2.5 in. exterior screws | 1 lb box | — | $12 |
| Finish | Penetrating exterior oil | 1 qt | — | $18 |
| Total | $203 (estimate) |
Before You Build
A few minutes of checking beforehand saves rework later. The figures above are estimates only: cedar, hardware, and finish prices vary by region, supplier, and season, so price your own list before buying.
- Measure the wall or fence section and confirm the 48-inch width and 68-inch height fit with room to walk past.
- Watch the spot through the day. Most herbs and salad crops want several hours of direct sun, and the top tier gets the most.
- Keep a hose or watering can within easy reach, since shallow boxes need frequent attention.
- Consider wind exposure. Open decks and corners that funnel gusts need the frame secured to a wall, fence post, or stud.
- Remember the planter gets far heavier once it is filled with damp growing mix, so choose the final location before you fill it.
Step-by-Step Assembly
Set up on a flat surface. A clean garage floor or a sheet of plywood laid over a driveway keeps everything square, and square boxes sit flat against the frame without twisting.
- Construct your three planting boxes first. Butt the end pieces snugly between the front and back boards, pre-drill every hole carefully, and drive two screws per corner. Cedar splits quite easily, so pre-drilling is mandatory.
- Drop the bottom boards into place and screw upward through them directly into the box sides. Before installation, drill five evenly spaced 1/2-inch drainage holes in each bottom board.
- Lay your two 2x2 upright posts parallel on the ground, exactly 46 inches apart on center, and securely clamp the boxes to them at 12, 30, and 48 inches from the bottom base. Staggering these heights can help the lower boxes receive ample sunlight.
- Drive two screws through the upright posts straight into the box ends. Now, the heavy-duty uprights carry the structural weight instead of the individual box corners.
- Fasten your 1x2 trellis slats across the top 20 inches of the frame, leaving roughly four-inch gaps ideal for climbing beans, sweet peas, or flowering vines.
- Sand any rough edges, then coat the whole structure with a penetrating exterior oil. Give the end grain two coats, since that is where moisture soaks in fastest. Check that the frame stands steady before you fill the boxes.
Drainage and Soil for Vertical Planters
Shallow boxes dry out faster in direct sun than in-ground beds, and they stay waterlogged if the drainage holes clog. Line the interior walls with breathable landscape fabric rather than solid plastic, stapled along the inside. The fabric keeps the mix from washing out while letting excess water drain and reducing direct contact between wet soil and the cedar.
Fill the boxes with a container growing mix rather than heavy garden soil or raw topsoil, which compacts in shallow containers. Two parts potting mix, one part compost, and a handful of perlite holds moisture while staying loose. Each spring, top up the first couple of inches with fresh compost instead of emptying the box.
Rest the finished planter on two 2x4 feet or paver blocks so the bottom boards are not sitting in puddles. Keeping the base out of standing water is one of the simplest things you can do for the wood's lifespan.
What to Plant and How to Keep It Alive
Match plants to box height. The top tier takes the most sun and wind, which suits tough Mediterranean herbs. The middle box works well for leafy greens, and the lower, partly shaded box suits moisture-loving herbs like mint, parsley, and lettuce.
Containers need water more often than in-ground beds, and how often depends on where you live. In hot, dry, windy weather — common through summer in the Southwest and much of the South — shallow boxes can need water daily. In cooler or more humid regions, or during mild spring weather, every second or third day is often enough. Use the finger test instead of a fixed schedule: push a finger two inches into the mix and water only if it feels dry. A one-inch layer of fine bark mulch on top can help reduce moisture loss and extend the time between waterings.
- Top tier: rosemary, creeping thyme, culinary oregano, and trailing sage
- Middle tier: crisp leaf lettuce, peppery arugula, baby spinach, Swiss chard, and strawberries
- Bottom tier: garden mint (safely contained here by design), curly parsley, cilantro, and bright violas
- Trellis section: climbing pole beans, sweet sugar snap peas, novelty cucamelons, or a compact blooming clematis
Seasonal Maintenance
Reapply your exterior penetrating oil to the cedar every second spring to keep it looking rich. Check and slightly snug up the screws connecting the boxes to the uprights once a year, as natural wood shifts slightly through seasonal weather changes. If you live in a harsh freezing zone, empty the top box before deep winter freezes so expanding wet soil doesn't strain the joints, and slide the unit against a sheltered wall out of fierce winter winds.
Sources & References
On building raised beds and planters:
• UMass Amherst Extension: Home Lawn and Garden resources
• USDA NRCS: Backyard Conservation: Raised Beds
On growing in containers:
• University of Georgia Extension: Gardening in Containers
Frequently Asked Questions
How long does this build actually take?
Time depends on your tools, cutting experience, and how much pre-cutting the lumber yard does. A short cut list and simple butt-joint construction keep the work manageable, but a first build with hand tools takes longer than one using a miter saw and pre-cut boards. Work at your own pace rather than racing a fixed schedule.
Can I build it with pressure-treated lumber to save money?
Pressure-treated lumber can work for outdoor structural parts such as feet or supports, and modern treatments differ from older formulas. Some gardeners prefer untreated cedar or redwood for the boxes themselves, especially when growing edibles, simply to avoid direct contact between the growing mix and treated wood. Either way, choose what matches your comfort level and local practice.
Will it tip over in high winds?
It can lean or shift if it sits on uneven ground or faces strong, steady winds. Place it on a stable, level surface and keep the feet in full contact with the ground. Where wind is a concern, secure the frame to an appropriate wall, fence post, or other structural support using hardware suited to that surface.
How much soil do I need to buy?
The exact amount depends on the interior length, width, and depth of each box and how full you plan to make them. The plans give overall outside dimensions but not precise interior box dimensions, so measure inside each box after assembly and multiply length × width × depth in inches, then divide by 1,728 to get cubic feet per box. Add the three boxes together and buy a little extra, since mixes settle after watering. Use a lightweight container growing mix rather than heavy garden soil.
Can I grow full-sized tomatoes in it?
Full-sized indeterminate tomatoes are a poor fit here. They need deep root space, steady moisture, and strong support, and a shallow wall box cannot easily provide any of those. Compact determinate or patio varieties may work in the top, sunniest box only if the root depth, support, and overall weight suit the frame. Even then, expect frequent watering and some extra staking.
Do I need to waterproof or seal the inside of the boxes?
No interior waterproofing is required. The design uses cedar or redwood plus breathable landscape fabric and open drainage holes, which lets excess water escape while keeping the mix in place. Keeping the base out of standing water matters more than sealing the inside. If you choose to apply any finish, use one rated for the intended use and follow the manufacturer's guidance for edibles.
Conclusion
Build the boxes square, drill and keep the drainage holes open, fill with a container mix rather than garden soil, and choose a spot with the sun and water access your plants need. Set the planter on level feet, and remember it becomes heavy and top-heavy once filled, so secure it where wind is a factor. For more weekend-friendly ideas, browse the DIY Home & Garden collection.
About the author
DIY & Home Maintenance Contributor
Emily writes the weekend build and upkeep pieces — cut lists, tools, what a project actually costs, and where a job is better handed to a licensed trade.
More from Emily CarterPublished · Updated
Related articles
30 Backyard Design Ideas for Real Yards and Budgets
Thirty backyard design ideas ranked by cost and effort — featuring planning budgets, maintenance expectations, and spatial requirements.
Summer Garden Maintenance Checklist: What to Do in June, July, and August
A pragmatic summer garden guide focused on adjusting watering, applying mulch correctly, monitoring pests, and transitioning toward fall crops.
Fresh home & garden ideas, every Sunday.
Join American homeowners getting practical home & garden advice on gardening, landscaping, and DIY. Free, no spam, unsubscribe anytime.